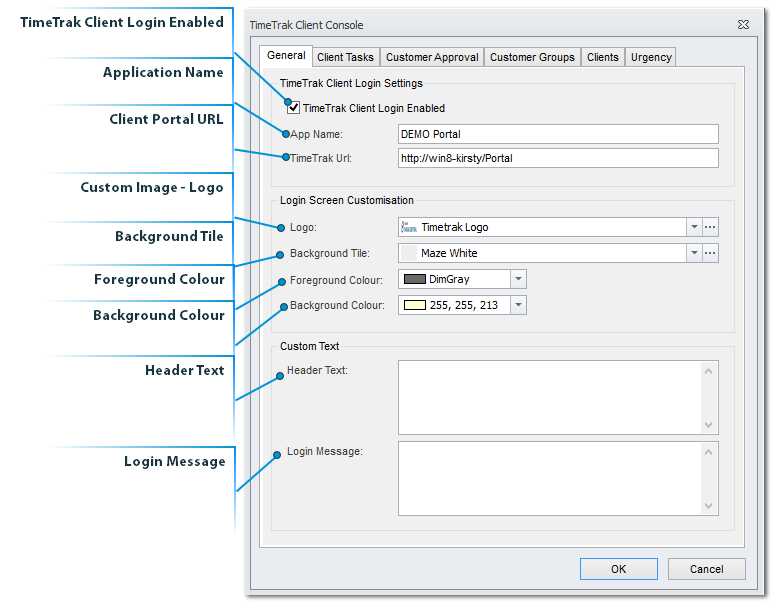
TimeTrak Client - General Settings
In this screen the Application Name and website URL are set here.
Your Exosoft consultant will have set this up for you when they set up the Client Portal website.
 TimeTrak Client Login EnabledThis setting will need to be ticked on activate the Client Portal.
|
|
 Application NameThis is usually the Organisations name.
Example: My Company Client Portal
|
|
 Client Portal URLThis is the URL which can be passed onto clients to log into the website to see their open tasks.
|
|
 Custom Image - LogoUpload the image and TimeTrak will automatically save the image in the correct location.
|
|
 Background TileCreate a new tile and upload it or use one of the existing tiles that come from the basic TimeTrak Client Portal install.
|
|
 Header TextEnter in header text to describe the portal to your client.
|
|
 Login MessageThis message will show up for all users under the login part of the screen.
|
|
 Foreground ColourSelect the foreground colour from the colour picker.
|
|
 Background ColourSelect the background colour from the colour picker.
This can be customised to match your organisations own colours.
|
|