To properly display this page you need a browser with JavaScript support.
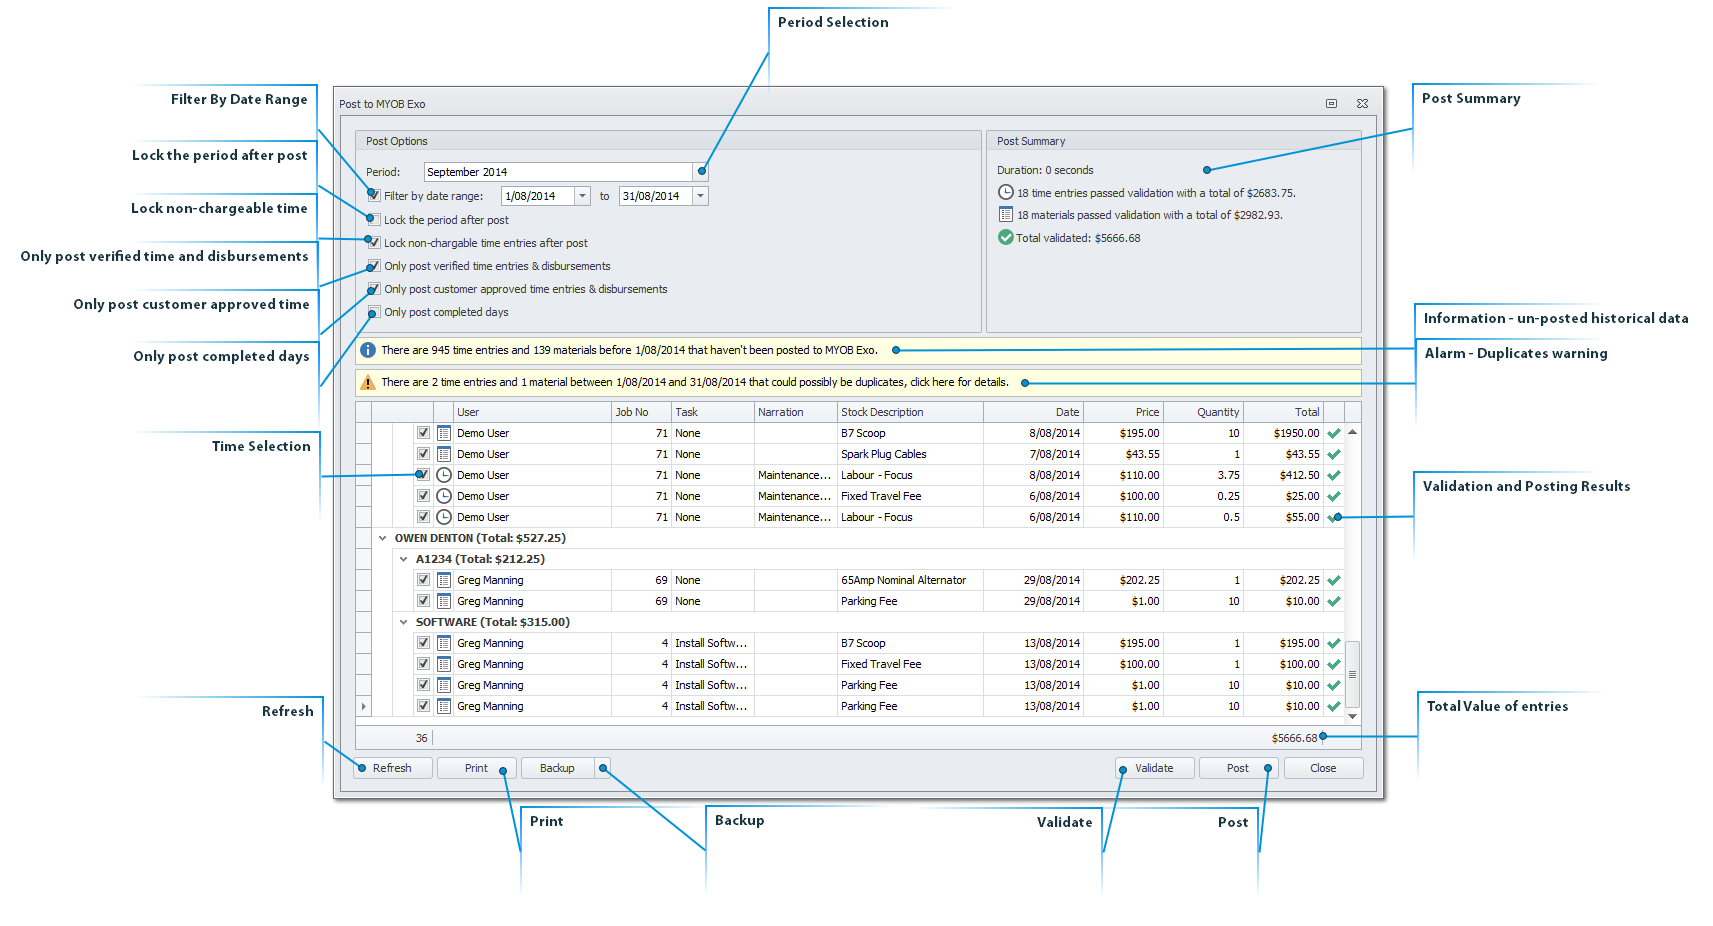
In the posting screen, users can use many ways to filter the time to be posted.
Note: The order of the data in the TimeTrak Posting screen is the same order the transactions will be against the job in MYOB Job Costing.
Period Selection Select the period that the transactions should be posted into MYOB Job Costing against.
This feature allows users to post time into a previous period if they do their billing after rolling MYOB Exo into the next period.
Filter By Date Range Select the dates of the time entries and disbursements that are to be posted through to MYOB Job Costing.
Lock the period after post This setting will lock the selected date range time entries and disbursements once they have been posted to MYOB Job Costing.
This ensures data integrity by making those entries un-editable.
Lock non-chargeable time This setting will lock the leave types and non-billable time entries in TimeTrak so they are not editable.
Only post verified time and disbursements This setting will look for time entries and disbursements which have been verified through either the
report and/ or the
report found in TimeTrak Professional, and post only those which are selected.
Only post customer approved time If the customer approval setting is enabled then posting can be limited to only those time entries and disbursements through to MYOB Job Costing.
Only post completed days Only post days in which users have completed the full day with the expected time.
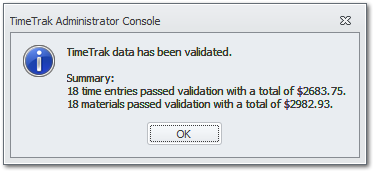
Post Summary The post summary will populate with the results from Validating the data, along with a pop-up confirming the values:
Information - un-posted historical data If there are time entries or disbursements not posted before the selected date range TimeTrak will provide a warning.
Users can double click into the warning to see what the time and disbursements are. (this will overwrite any previously selected settings )
Alarm - Duplicates warning If there are time entries or disbursements which look like they could be duplicates in the selected date range TimeTrak will provide a warning.
Users can double click into the warning to have a pop-up screen display the duplicates and if required edit the entry.
Validation and Posting Results Down the side of the screen on validation and then on posting a tick, cross or exclamation mark will show on each entry.
If the result is a cross or exclamation mark then users can hover over the icon to get a message of what is concerning about the entry.
Time Selection Tick or un-tick an entry to include or exclude it from the posting to MYOB Job Costing.
Total Value of entries This value can be used for validation between the TimeTrak verification reports, and once posted the MYOB Job Costing Work In Progress reports.
Refresh Click refresh to update the entries if the selection options have been altered.
Print Print out a copy of the posting results before completing the post to MYOB Job Costing.
Backup Select the TimeTrak or MYOB Exo databases to back up before running the post to MYOB Job Costing.
Validate This will run through the data and check that the data is valid between TimeTrak and MYOB Job Costing.
A few things that are checked include, active jobs, active stock items, active staff.
Post Clicking on this button will begin the posting of entries into MYOB Job Costing and locking of the time entries, if that option is selected.
Initially a warning will come up, please read this before clicking YES to post.
Confirmation of a successful post will pop-up.