MYOB Exo Clients
© Exosoft 2011
MYOB Exo Clients
When the 'Clients' link is selected, this displays a panel to the right of the calendar, showing all the active clients from your MYOB EXO Database. You can search for a client by typing any part of a client's name, the clients alpha code or account number.
If the client uses a currency other than your default, the currency code displays beside their name in brackets.

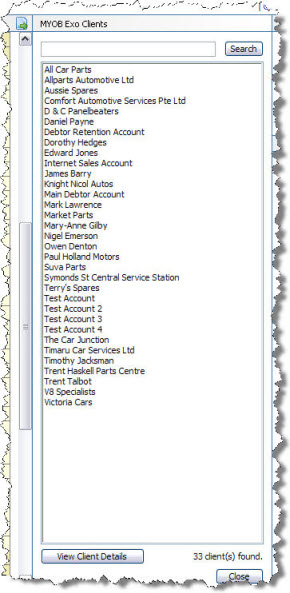
To view a clients' details you can either double click on the client in the list or highlight the client and click on the 'View Client Details' button. The 'Client Details' screen will open showing the details you hold in your MYOB EXO database for that client.
It provides:
Company Details
Credit Information
Aged Balances (where this setting is enabled in TimeTrak Administrator Console)
Links to MYOB EXO Contacts|Jobs|Notepad|History Notes|Customer Location|Get Directions (Where Google Maps has been enabled in TimeTrak Administrator Console).
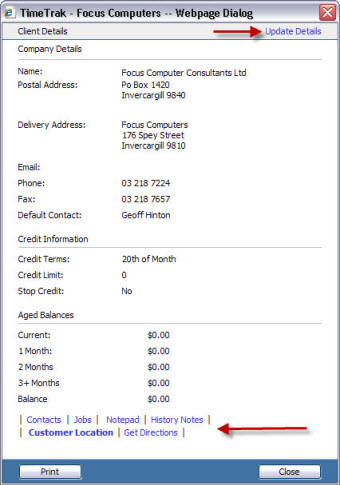
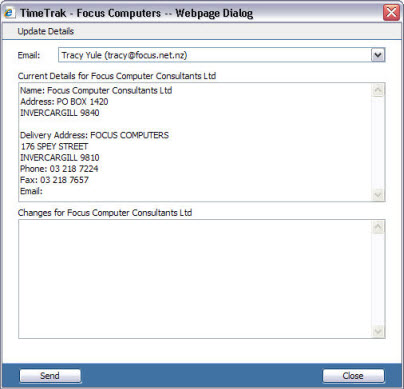
You can send an email to an administrator requesting a change of details by clicking on the 'Update Details' button on the top right corner of the 'Client Details' page. (shown above).
TimeTrak does not allow you to directly edit client details, but allows you to email a request to your Administrator to update your MYOB EXO database.
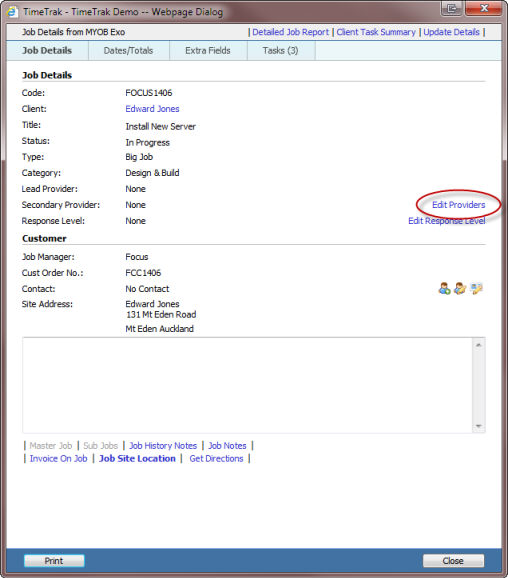
Version 2.14 and later of TimeTrak offers you the ability to change the providers on a job. It is important to note that this does not change the service providers in MYOB Exo.
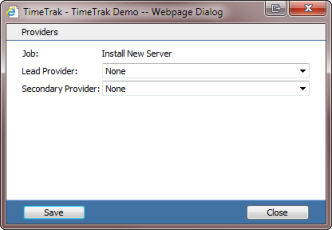
1) Click on the 'Edit Providers' link. This will open a small window labelled 'Providers'. The Job title will be in the first box.
2) Change and lead and / or secondary providers by choosing from the drop down list of your staff.
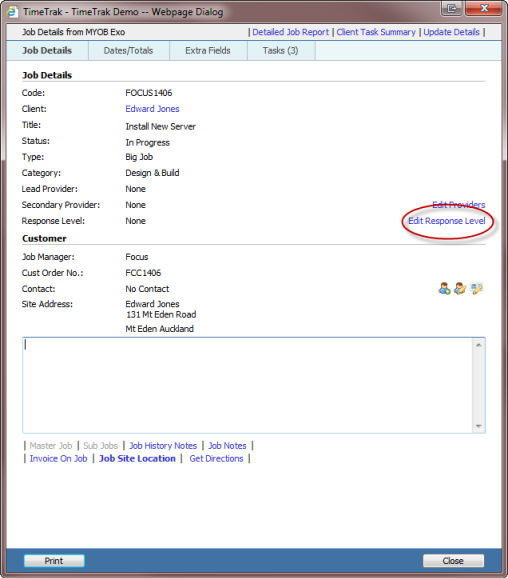
Version 2.14 and later of TimeTrak offers you the ability to change the response level on a job.
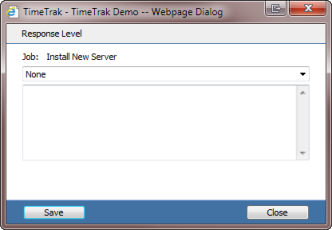
1) Click on the 'Edit Response Level' link. This will open a small window labelled 'Response Level'. The Job title will be in the first box.
2) Change the response level by choosing from the drop down list of response levels set for the client.
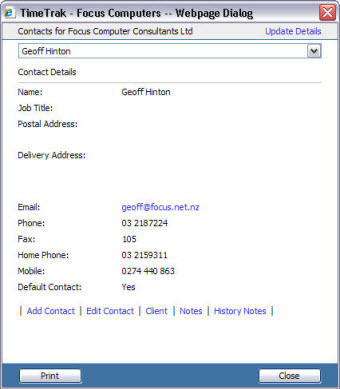
You can view contacts for a client by clicking on the 'contacts' link at the bottom of the 'Client Details' screen. This opens the 'Contact Details' screen. See "MYOB Exo Contacts". With the appropriate security settings enabled you can also add and edit contacts, as well as add and edit contact notes and history notes.
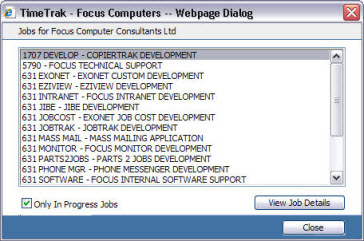
You can view all MYOB EXO jobs for a client by clicking the 'Jobs' link in the 'Client Details' screen. This opens a page with a list of jobs. If you choose a job from that list (either double click or click on "View Job Details") then the 'Job Details' screen displays. See "MYOB Exo Jobs"
You can view the MYOB EXO Debtor Notes for a client by clicking on the 'Notepad' link at the bottom of the 'Client Details' screen.

You can edit and add to this note using the displayed screen as long as your security permissions have editing enabled.
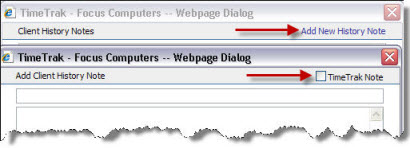
Click on the "History Notes" link in the "Client Details' window to view a list of MYOB EXO history notes for the client.
You can add & edit history notes providing your security permission is enabled for this feature.
Choose which history note you would like to read by using the drop down box.
You can make the note a "TimeTrak Note", if you tick the box in the top right corner. A TimeTrak note will appear on the bottom of the 'TimeTrak' entry screen and the Task Window (if TaskTrak is installed). See the 'Time Entries' section for further information.
TimeTrak notes are used to store information that is important when adding the time and tasks eg: Distance to site for travel charges.
These history notes will be visible in both MYOB EXO and in TimeTrak.
This will only be visible if Goggle Maps are enabled.
Click on the 'Customer Location' link in the 'Client Details' screen to open the map indicating the customers location. If the location has not been set you can do this by entering their address in the 'Address Search' field and clicking 'Search' once the map brings up a solid red apostrophe you can click 'Save' at the bottom right of the screen to lock in the customers location. See the 'Google Maps' section of these Help Files for further information.
You can also click a location on the map to set a new location.
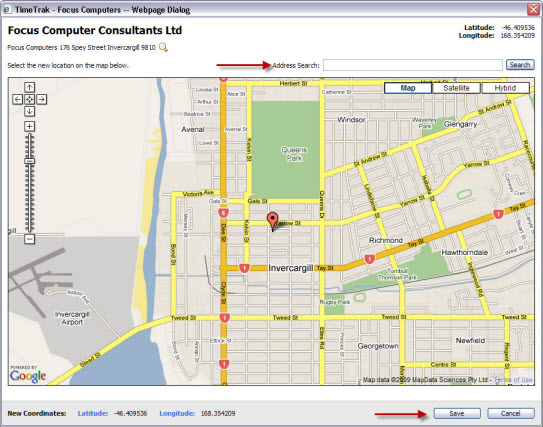
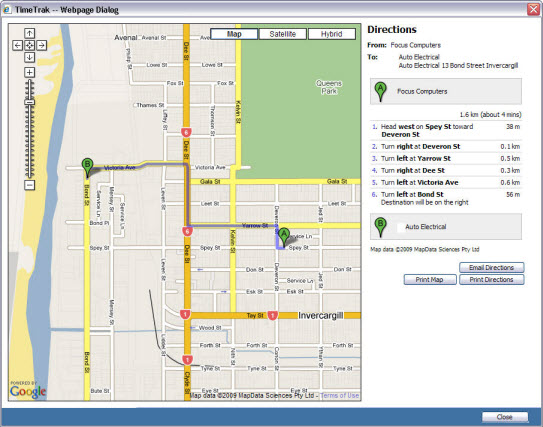
By clicking on 'Get Directions' in the 'Client Details' window - a map will open providing directions from your location (This must be set first - see the 'Google Maps' section of these Help Files) to your clients location.